
Keycloak Integration
This guide demonstrates how to integrate the OIDC Bridge with Keycloak, enabling users to log in with Verifiable Credentials.
Overview
Keycloak will treat the OIDC Bridge as an external OIDC Identity Provider. When users click "Login with Verifiable Credential," Keycloak redirects them to the OIDC Bridge, which handles credential presentation and returns OIDC tokens.
Prerequisites
- OIDC Bridge service created, together with its KMS and Verifier2 dependencies (see Setup).
- The bridge's KMS contains at least one key. The bridge signs ID tokens with the first key in its attached KMS; if the KMS is empty, the
jwksendpoint returns no keys and token issuance fails. Generate one with the KMS Create Key endpoint. - Keycloak instance running, with admin access.
- Keycloak can reach the bridge's issuer URL. Keycloak fetches the discovery document and exchanges the code server-to-server, so the bridge hostname must resolve from wherever Keycloak runs. If Keycloak runs in Docker, add a host mapping (e.g.
extra_hosts) so the bridge hostname resolves to the host from inside the container.
Step 1: Create the OIDC Bridge with a Keycloak Client
Create the bridge with a client entry for Keycloak. Each enabled flow includes its own verificationSetup (the credential request), so the service works as soon as it is created.
Endpoint: /v1/{target}/resource-api/services/create | API Reference
Example Request
curl -X 'POST' \
  'https://{orgID}.enterprise-sandbox.waltid.dev/v1/{org}.{tenant}.oidc-bridge/resource-api/services/create' \
  -H 'Authorization: Bearer {yourToken}' \
  -H 'Content-Type: application/json' \
  -d '{
  "type": "oidc-bridge",
  "issuerUrl": "https://enterprise.example.com",
  "clients": {
    "keycloak": {
      "clientId": "keycloak",
      "clientSecret": "keycloak-client-secret",
      "redirectUris": [
        "https://keycloak.example.com/realms/{realm}/broker/oidc-bridge/endpoint"
      ],
      "allowedScopes": ["openid", "profile", "email"]
    }
  },
  "defaultClaimMappings": [
    { "oidcClaim": "sub", "credentialPath": "$[\"org.iso.18013.5.1\"][\"document_number\"]", "transform": "NONE" },
    { "oidcClaim": "given_name", "credentialPath": "$[\"org.iso.18013.5.1\"][\"given_name\"]", "transform": "NONE" },
    { "oidcClaim": "family_name", "credentialPath": "$[\"org.iso.18013.5.1\"][\"family_name\"]", "transform": "NONE" },
    { "oidcClaim": "birthdate", "credentialPath": "$[\"org.iso.18013.5.1\"][\"birth_date\"]", "transform": "NONE" }
  ],
  "flows": {
    "qr": {
      "enabled": true,
      "buttonLabel": "Scan QR Code",
      "verificationSetup": {
        "flow_type": "cross_device",
        "core_flow": {
          "dcql_query": {
            "credentials": [
              {
                "id": "mdl",
                "format": "mso_mdoc",
                "meta": { "doctype_value": "org.iso.18013.5.1.mDL" },
                "claims": [
                  { "path": ["org.iso.18013.5.1", "given_name"] },
                  { "path": ["org.iso.18013.5.1", "family_name"] },
                  { "path": ["org.iso.18013.5.1", "birth_date"] },
                  { "path": ["org.iso.18013.5.1", "document_number"] }
                ]
              }
            ]
          }
        }
      }
    },
    "dc_api": {
      "enabled": true,
      "buttonLabel": "Browser Wallet",
      "verificationSetup": {
        "flow_type": "cross_device",
        "core_flow": {
          "dcql_query": {
            "credentials": [
              {
                "id": "mdl",
                "format": "mso_mdoc",
                "meta": { "doctype_value": "org.iso.18013.5.1.mDL" },
                "claims": [
                  { "path": ["org.iso.18013.5.1", "given_name"] },
                  { "path": ["org.iso.18013.5.1", "family_name"] },
                  { "path": ["org.iso.18013.5.1", "birth_date"] },
                  { "path": ["org.iso.18013.5.1", "document_number"] }
                ]
              }
            ]
          }
        }
      }
    }
  },
  "dependencies": [
    "{org}.{tenant}.kms",
    "{org}.{tenant}.verifier2"
  ]
}'
The redirect URI must exactly match Keycloak's broker endpoint for the provider alias you configure in Step 2:
https://{keycloak-host}/realms/{realm-name}/broker/{provider-alias}/endpoint
This example uses the alias oidc-bridge.
Step 2: Configure Keycloak Identity Provider
2.1 Access Keycloak Admin Console
- Navigate to:
https://keycloak.example.com/admin - Log in with admin credentials
- Select your realm
2.2 Add the Identity Provider
- Go to Identity Providers in the left menu.
- Click Add provider → OpenID Connect v1.0.
- Fill in the add form:
| Field | Value |
|---|---|
| Alias | oidc-bridge (or your preferred alias — it must match the redirect URI you allowed in Step 1) |
| Display name | Login with Verifiable Credential |
| Use discovery endpoint | On |
| Discovery endpoint | https://enterprise.example.com/v1/{org}.{tenant}.oidc-bridge/oidc-bridge-api/.well-known/openid-configuration |
| Client authentication | Client secret sent in the request body |
| Client ID | keycloak |
| Client Secret | keycloak-client-secret |
When the discovery endpoint validates (green check), Keycloak fetches the bridge's metadata and auto-fills the Authorization URL, Token URL, JWKS URL, and Issuer.
- Click Add.
PKCE and Scopes can't be set while adding the provider. On the Add screen the Use PKCE toggle is disabled and there is no PKCE Method or Scopes field — Keycloak only exposes them on the provider's Settings page. Configure them in the next step.
2.3 Enable PKCE and Scopes
Clicking Add opens the new provider's Settings page. Set the following, then click Save:
| Field | Value | Location on the Settings page |
|---|---|---|
| Use PKCE | On | OpenID Connect settings |
| PKCE Method | S256 | appears only after Use PKCE is switched On |
| Scopes | openid profile email | OpenID Connect settings → expand Advanced |
The Redirect URI shown at the top of this page (https://{keycloak-host}/realms/{realm}/broker/{alias}/endpoint) must exactly match one of the bridge client's redirectUris from Step 1 — with the alias oidc-bridge it already does.
2.4 Configure Claim Mappers
The claim mappings in Step 1 emit sub, given_name, family_name, and birthdate. Keycloak uses sub as the federated user identity automatically, so you add mappers for the remaining claims. given_name and family_name map onto Keycloak's built-in profile fields; birthdate has no built-in field, so it becomes a custom attribute:
- Go to Identity Providers → oidc-bridge → Mappers
- Click Add mapper
Create these mappers:
Given Name Mapper
- Name:
given-name-mapper - Mapper Type:
Attribute Importer - Claim:
given_name - User Attribute Name:
firstName
Family Name Mapper
- Name:
family-name-mapper - Mapper Type:
Attribute Importer - Claim:
family_name - User Attribute Name:
lastName
Birthdate Mapper (custom attribute)
- Name:
birthdate-mapper - Mapper Type:
Attribute Importer - Claim:
birthdate - User Attribute Name:
birthdate
Because birthdate is not a built-in Keycloak field, it lands as a custom attribute on the user's Attributes tab.
Keycloak 24+ drops unmanaged attributes by default. Custom attributes (like birthdate) that aren't defined in the realm's user profile are silently discarded — the mapper runs, but the attribute never appears on the user. To keep them, do one of the following:
- Enable unmanaged attributes: Realm settings → General → Unmanaged Attributes → set to
Enabled(orEnabled (admin only)). - Define the attribute: add
birthdateunder Realm settings → User profile, which also gives it a proper label and validation.
Add a mapper for any additional claim the OIDC Bridge emits — the Claim name must match an oidcClaim in the bridge's claim mappings. To surface a new claim (e.g. email), add it to the bridge's defaultClaimMappings (and the flow's DCQL) first, then map it here. Any claim without a built-in Keycloak field appears as a custom attribute (subject to the unmanaged-attributes note above).
Step 3: Test the Integration
3.1 Navigate to Login Page
Go to your Keycloak-protected application or the Keycloak account page:
https://keycloak.example.com/realms/{realm}/account
3.2 Initiate VC Login
Click "Login with Verifiable Credential" (or your configured display name).
You'll be redirected to the OIDC Bridge presentation page.
3.3 Present Credential
Choose your preferred presentation method:
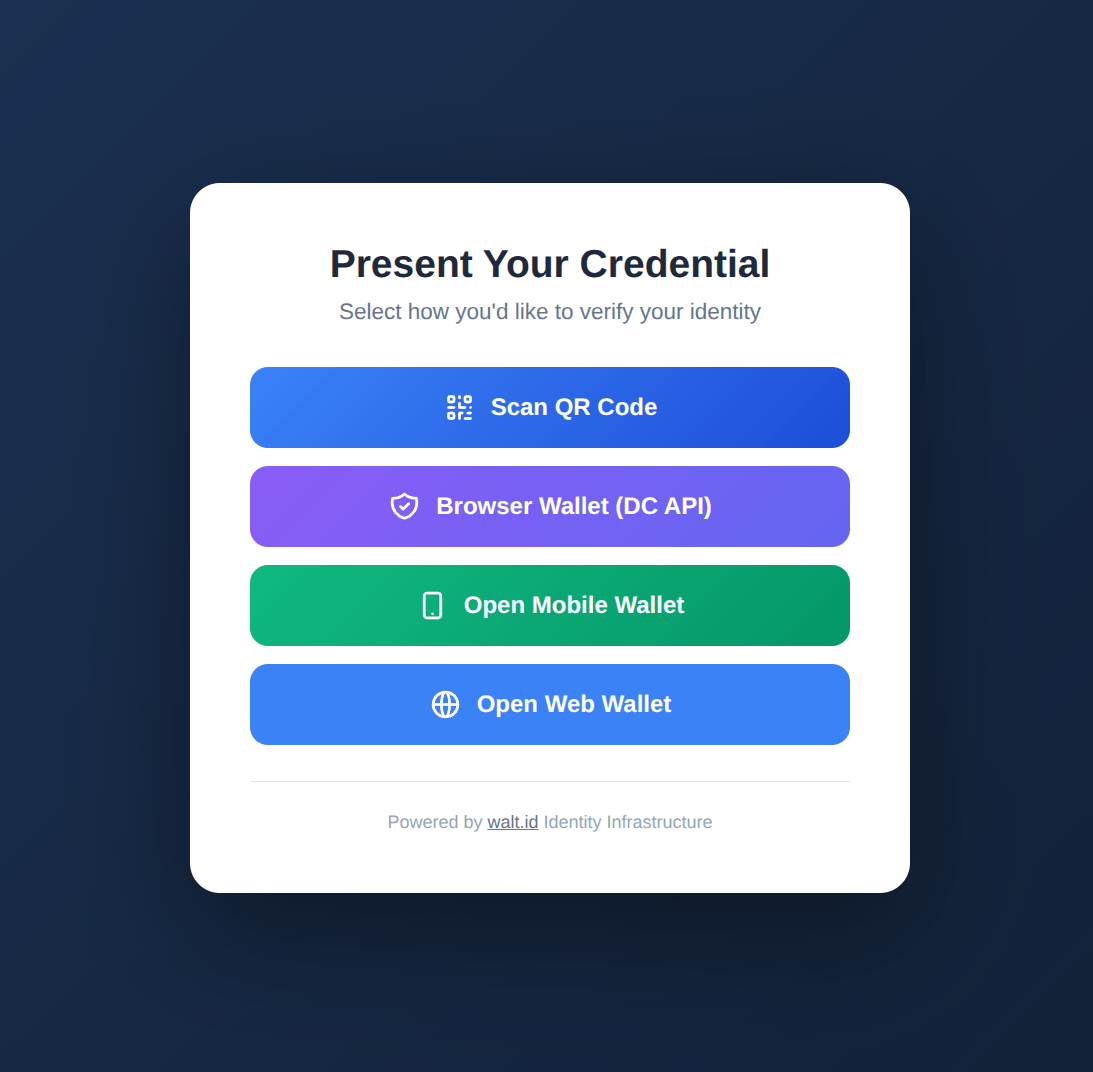
- Scan QR Code — Use your mobile wallet
- Browser Wallet — If using Chrome with DC API
- Open Mobile Wallet — For same-device flow
- Open Web Wallet — Redirect to web wallet
Present your mDL or other credential when prompted.
3.4 Complete Login
After successful presentation:
- OIDC Bridge validates the credential
- Extracts claims based on your mappings
- Issues OIDC tokens
- Redirects back to Keycloak
- Keycloak creates/updates the user account
- You're logged in!
Step 4: Verify User Data in Keycloak
- Go to Users in Keycloak Admin
- Find the newly created user
- Check the user's details and Attributes tab
You should see:
firstName,lastName— from the mappers, on the built-in profile fields.birthdate— under the Attributes tab, as a custom attribute.- The federated identity is keyed on
sub(the mDLdocument_number), shown under the user's Identity provider links.
Advanced Configuration
Auto-Create Users
By default, Keycloak creates users on first login. To customize:
- Go to Identity Providers → oidc-bridge
- Under First Login Flow, select a flow (default:
first broker login) - Customize the flow in Authentication → Flows
Require Email Verification
To require email verification after VC login:
- Edit the
first broker loginflow - Add a Verify Email step
- Set to Required
Note: mDL credentials don't contain email addresses by default. You may need to use a different credential type or set email manually.
Link Existing Accounts
To allow users to link their VC login to existing Keycloak accounts:
- Go to Identity Providers → oidc-bridge
- Set First Login Flow to
first broker login - This flow prompts users to link or create accounts
Trust Only Specific Issuers
Integrate with the Trust Registry Service:
- Link Trust Registry to your Verifier2 service
- Enable the
etsi-trust-listpolicy in Verifier2 - Only credentials from trusted issuers will be accepted
Next Steps
- Claim Mappings — Customize attribute extraction
- Multi-Flow Configuration — Configure presentation methods
- Trust Registry Integration — Add issuer trust verification